
Let’s talk about the gentle art of not turning your produce into carbonized regrets. You want vegetables with actual texture and flavor, not sad, soggy slabs that slide through the grates. The difference between grilled greatness and dinner disappointment comes down to timing, temperature, and a few hard-won lessons from the fire.
What You Need to Know First
- Cut everything to 1/3, 1/2 inch thickness so it cooks evenly
- Split your grill: 400, 450°F direct zone and 200, 300°F indirect zone
- Group vegetables by density, not just what looks pretty together
Best For: Zucchini, bell peppers, asparagus, mushrooms, eggplant, corn, onions, potatoes
You’ll move dense vegetables like potatoes and carrots to the cooler side after searing. You’ll pull tender vegetables like tomatoes and asparagus before they go limp. You need specific minutes for each type, not guesswork.
The complete timing breakdown waits below. Your grill deserves better than hope.
Quick Reference: Grill Times by Vegetable Type
How do you know when to flip? You’ll watch for char marks and slight softening at the edges. Grill times vary sharply by vegetable type, so you can’t treat them all the same.
Watch for char marks and edge softening—grill times vary sharply by vegetable, so never treat them all the same.
Fast-Cooking Vegetables (5–8 minutes per side)
Zucchini and yellow squash hit sweet spots at 5–7 minutes. Asparagus needs 6–8 minutes for tender, crisp results.
Medium-Cooking Vegetables (8–12 minutes)
Bell peppers run 10–12 minutes whole, 8–10 minutes halved. Onions and mushrooms both take 8–10 minutes on direct heat.
Longer-Cooking Vegetables (15–20 minutes total)
Carrots demand patience, often 15–20 minutes depending on thickness.
Most vegetables finish within 20–25 minutes at 400–425°F. Denser pieces need more time; tender pieces need less. Watch closely and trust what you see.
Recommended Products

Ensure Safe, Delicious Cooking. Meat Temperature Magnet features a USDA chicken meat temperature chart, a beef meat temp chart, and charts for pork, seafood, sausages, lamb and more - perfect for quick, reliable meat doneness. Ideal for use on grills, smokers, or ovens, this cooking temperature chart promotes food safety and flavor by removing guesswork - an essential magnetic kitchen accessory for home cooks, BBQ lovers, and food safety-conscious chefs alike.

Time to Fire It Up –– Produce superior flavor that will drop jaws and make mouths water. These temperature chart pellet grill accessories include everything you need to know to hone your skills. From suggested wood pairings to internal temperature, smoke like a pro with these grill accessories for outdoor grill setups

Time to Fire It Up –– Produce superior flavor that will drop jaws and make mouths water. These temperature chart pellet grill accessories include everything you need to know to hone your skills. From suggested wood pairings to internal temperature, smoke like a pro with these grill accessories for outdoor grill setups
Cut Uniform Pieces for Even Cooking
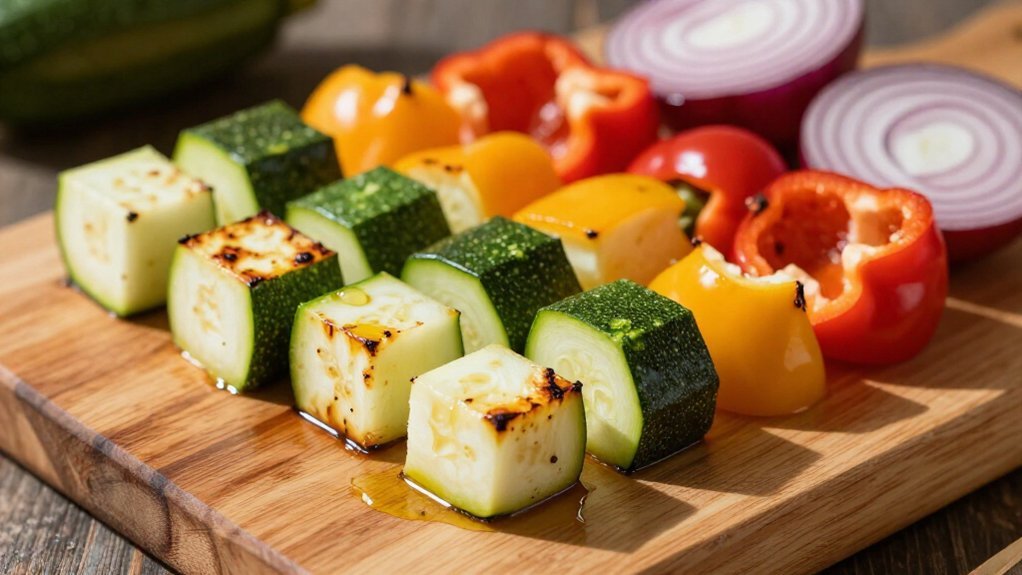
Even cooking starts with the knife. Aim for uniform cuts between 1/3 and 1/2 inch thick. This piece size ensures consistent heat reaches every surface at the same rate.
Match shapes to density. Cut zucchini and eggplant into planks. Slice peppers into panels. These forms synchronize cooking times across different vegetables.
Use a grill basket or skewers for smaller items. You’ll prevent losses through grates and maintain steady contact with flames. This guidance keeps your vegetable grilling controlled and predictable.
Group by cooking times. Start dense vegetables first. Add medium pieces next. Finish with tender items.
Cut sizes must suit your method: thick onion wedges and corn take direct heat longer. Small pieces belong in baskets or perforated pans.
Recommended Products
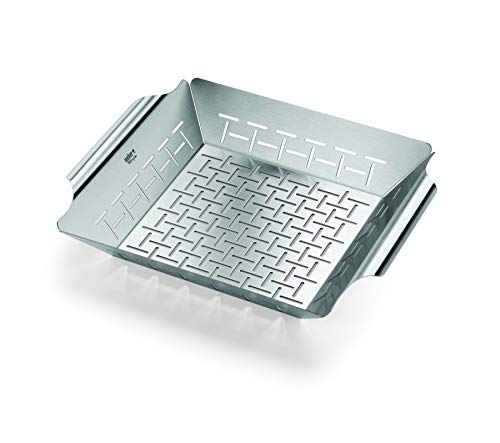
Ideal for vegetables and smaller pieces of meat

【TO BE A PROFESSIONAL CHEF】-Grilling is an art. And when you’ve mastered that art…your friends double in numbers. JY COOKMENT Grill basket can help you to the master of grilling.

[3 Custom Divided Sections]: Opt to divide the grill basket into 3 sections to keep different types of BBQ food separated in case of mixed taste. You can cooking sharps, steaks and vegetables at the same time without mix the flavor with this grilling accessories. Or you can remove the dividers for a more large cooking space
Dry and Salt High-Moisture Vegetables First
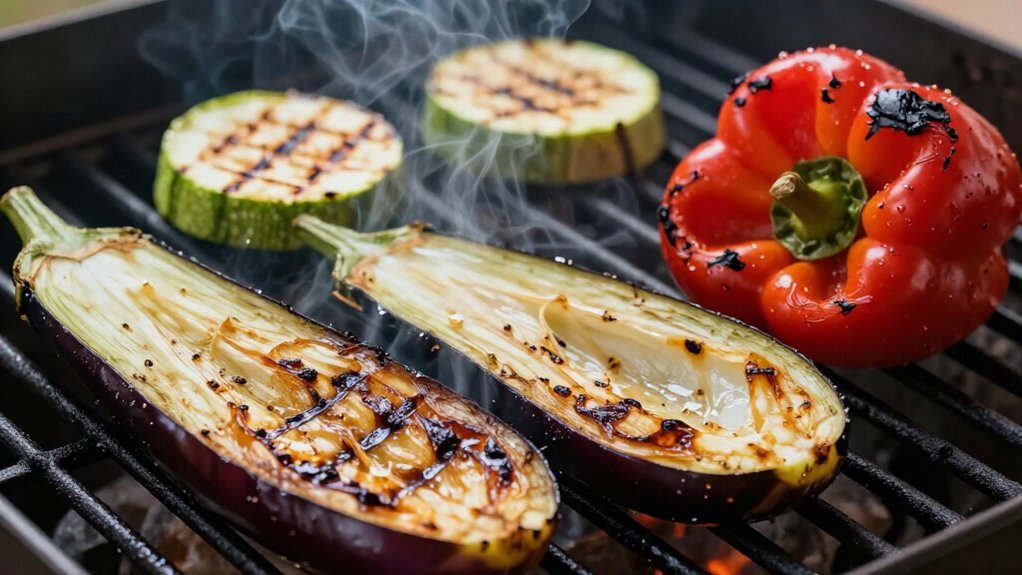
You’ll want to salt high-moisture vegetables like zucchini and eggplant before they hit the grill, because drawing out that surface water is what gets you real browning instead of a steamed, soggy mess. Give your cut pieces a good sprinkle, let them rest for about 30 minutes while the liquid drains out, then pat them bone-dry so you’re ready to sear without flare-ups ruining your cook.
This step matters most for water-heavy vegetables, and you’ll always do it before oiling or final seasoning so the surface can actually char.
Recommended Products

Durable Non-Stick Carbon Steel Crafted from carbon steel with a non-stick coating, this grill pan resists rust and ensures effortless food release.

Grill pan for small or delicate foods

【Father's Day Gift】 The perfect Father's Day gift designed for fathers, stepfathers, grandfathers, and fathers in law who love barbecue.
Why Salting Matters
Some of the worst grilled vegetables I’ve ever served came from skipping one simple step. You toss zucchini or eggplant straight onto the grill, and they steam in their own juices. Sogginess ruins everything.
Salt-Assisted Drainage Saves Your Texture
You need salting in your vegetables prep. Cut your high-moisture vegetables, sprinkle salt generously, and wait 30 minutes. You’ll watch moisture removal happen right before your eyes. Pat them dry. This salt-assisted drainage improves your direct heat grilling results.
Why Browning Depends on Dryness
Wet surfaces can’t brown. You need dry surfaces for proper browning and char. Salt draws out water, concentrates flavor, and builds that caramelized crust you’re after. Your grilled vegetables develop better texture and deeper taste.
Skip this step, and you’re steaming. Do it, and you’re actually grilling.
Timing and Technique
Salting draws moisture out, but timing turns that prep into perfect results. You’ll want to rest cut pieces about 30 minutes before grilling. This window lets salting work on zucchini and other high-moisture vegetables, pulling excess moisture to the surface.
Pat everything completely dry after that rest. Dry surfaces mean better browning when you hit direct heat. Wet vegetables steam instead of sear, and you’ll fight flare-ups too.
Start denser vegetables first. Potatoes, carrots, and corn need longer grilling times. Add quicker-cooking items later so everything finishes together.
Set up cooking zones by moisture content and size. Group similar vegetables together. You’ll manage different grilling times without burning half your meal while the other half stays raw.
Best Vegetables to Salt
Zucchini and eggplant top the list of vegetables that need this treatment. These high-water-content vegetables hold too much liquid for direct grilling. You’ll get better results with proper moisture removal first.
Why Salt-and-Rest Works
Salting draws out excess water through osmosis. You cut zucchini and eggplant into slices, sprinkle salt generously, and wait 30 minutes. Pat them dry before grilling vegetables. This prevents steaming and promotes real browning.
What You Gain
Without this step, your eggplant turns mushy. With it, you build crust formation that holds sauces and char. The salt-and-rest method beats marinating for these specific vegetables. You’re controlling moisture, not adding flavor that burns.
Best For
- Zucchini rounds and planks
- Eggplant steaks and cubes
Skip this with drier vegetables like peppers or onions. They don’t need the help.
Pre-Cook Dense Vegetables (Optional Step)
Why fight with a potato that blackens outside while staying raw in the middle? You pre-cook dense vegetables to solve this exact problem. Potatoes, carrots, corn, and thick onions all benefit from this step.
How to Pre-Cook
You steam or microwave dense vegetables for 5–8 minutes. You can also parboil them briefly. This creates even cooking and fixes your grill timing completely.
Stair-Step Cooking Made Simple
You align slower items with quicker ones. You place parboiled pieces over indirect heat while lighter vegetables hit direct heat. Everything finishes together.
Stop the Cooking
You let pre-cooked vegetables rest briefly. If you parboiled, you transfer them to an ice bath. This halts cooking and preserves texture.
Best For: Mixed grills with varied densities.
Recommended Products


Iconic blend of coarsely ground pepper, salt and garlic

Compatibility: Compatible with 18"/22"/26" Weber kettle grills and other similar size d charcoal and ceramic grills such as compatible with Charbroil, Big Green Egg, Kamado Joe etc. Don't Compatible with Weber Jumbo Joe Charcoal Grills.
Oil Generously: Skip the Raw Marinade
A generous coating of oil is your first real defense against dry, sticking vegetables on the grill. You oil generously to lock in moisture and build that essential char and tenderness. Skip the raw marinade; it won’t penetrate vegetables like meat, and sugary or acidic mixtures burn before your grill times finish.
Your oil application belongs on the vegetables, not the grates. This ensures even browning and prevents sticking. Brush your produce thoroughly, then season simply.
Save your flavor punches for finishing sauces. Brush on chimichurri, miso butter, or chile oil during the last minutes of cooking, or serve them alongside. This grilling technique protects delicate flavors from scorching and lets you control intensity.
You’ll get better grilled vegetables with less waste and more consistent results.
Recommended Products
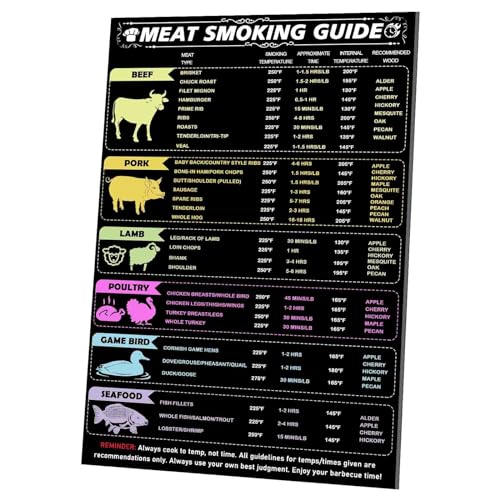
Meat smoking guide: This is a helpful guide for you want to smoke meat to save time searching on your phone. The chart includes meat type, smoking temperature, approximate time of smoking, internal temperature and wood types. In addition to your grill and BBQ tools, it is essential to prepare a guide.

🥩 Comprehensive Meat Temperature Guide: Our Meat Cooking Temperature Chart Magnet is a magnetic chart designed for beef, pork, fish, and poultry, covering a range from rare to well-done, including brisket. Never second-guess your meat temperatures again.

MAGNETIC MEAT TEMPERATURE CHART: This meat temperature chart has a magnetic backing and attaches to flat metal surfaces, such as refrigerators, microwaves, smokers, and any metal utensils. Caution: Keep the meat temperature magnet away from high temperatures, as this will shorten its lifespan
Set Up Hot and Cool Grill Zones
You’ll want to build two distinct zones on your grill before you light anything. Crank one side to 400–450°F for your direct heat zone, where you’ll char potatoes, carrots, and thick onion wedges first. Keep the other side cooler or off entirely for your indirect zone, so you can slide tender zucchini, peppers, and squash there to finish without burning.
Recommended Products
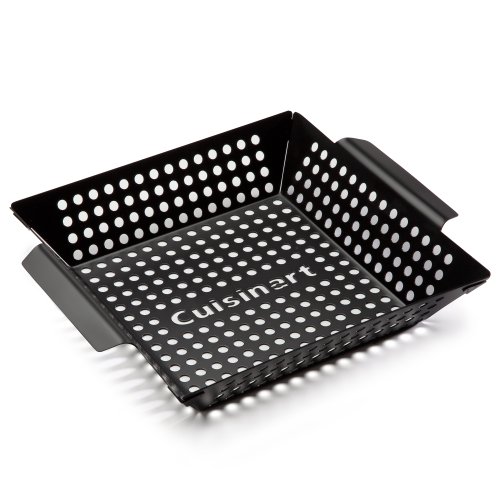
AVOID THE GRATE ESCAPE: Perforated design keeps the open-flame flavors while preventing small ingredients from falling through grill grates.

NICE ACCESSORIES: 12*6*3 inch grilling baskets, you can grill all kinds of food, set also includes: 1 grill basket, 1 grill brush, 4 iron skewers, 1 storage bag, will give you a happy grilling experience

Complete High-Quality Grilling Value Set - Conquer the grill with your own tools to help you prepare your famous BBQ recipes. The SHIZZO Set includes a grill basket, basting brush, Stainless Steel Skewers, and even a portable case for a BBQ away from home.
Direct Heat Zone Setup
How do you keep zucchini from burning while potatoes stay raw in the middle? You master your direct heat zone first. You’ll set up this sizzling surface for vegetables that need quick browning and shorter cook times.
Best For Direct Grilling
- Zucchini planks
- Pepper panels
- Eggplant slices
- Onion wedges
- Corn on the cob
- Asparagus spears
You’ll preheat this zone to 400–450°F, high heat that sears on contact. No grill basket needed here unless pieces get small; it lets flames kiss your vegetables directly.
You place food across the grates, close the grill lid to trap heat, and wait. Then you turn vegetables after 3–5 minutes. That flip creates even char on both sides. Keep your eyes on tender items; they move fast under direct heat.
Indirect Heat Zone Setup
Direct heat gives you char, but it can’t finish the job alone. You need an indirect heat zone to complete the job without burning. Heat management starts with preheating your grill to 400–450°F for the direct zone, then establishing a cooler 200–300°F indirect zone on the other side.
Build two zones: Stack coals on one side only; leave the other empty for indirect heat.
Use a grill basket****: Drop smaller pieces in so nothing slips through to the flames.
Shift dense vegetables: Move potatoes, carrots, and thick onions to the indirect zone to finish cooking gently.
Keep the lid closed: Trap heat for even doneness throughout.
Rest vegetables: Pull them off and let sit five minutes so juices settle.
You’ve now mastered zone setup.
Zone Temperature Management
Where exactly should each vegetable land when the flames are roaring? You’ll master this by setting up proper grill zones. Preheat grill with direct heat at 400–450°F on one side for searing. Keep indirect heat at 200–300°F on the other side for finishing heat.
Best For Temperature Zones
- Direct heat zone: Start dense vegetables here. Sear zucchini halves, potato wedges, or carrot chunks first.
- Indirect heat zone: Move items here after searing. Let them finish cooking through without burning.
Load a grill basket with small mushrooms or cherry tomatoes. You can shift it between zones easily. Keep the lid closed to maintain steady heat management across both areas.
Rest vegetables for three minutes after grilling. Juices reabsorb, and residual heat completes doneness. You’ve now controlled temperature zones from start to finish.
Time Your Vegetables: 5–35 Minutes by Density
Why guess when you can grill with precision? You time your vegetables by density to lock in perfect doneness. Start dense vegetables, potatoes, carrots, corn, thick onions, at 400–425°F using direct heat; they need 25–35 minutes and sometimes partial pre-cooking before they hit the grill.
Add medium vegetables, peppers, eggplant, mushrooms, broccoli, cauliflower, after 10–15 minutes so everything finishes together. Toss tender zucchini, yellow squash, asparagus, tomatoes in last; they only need 5–10 minutes.
- Load your grilling basket with similar densities for even cooking
- Keep temperature steady across zones
- Separate cooking times with multiple baskets or grill sections
- Watch dense vegetables closely; they dictate total timeline
- Trust medium vegetables as your bridge between hard and soft
You manage the medley, you control the outcome.
Recommended Products

GRILL MEAT AND VEGETABLES on this small stainless steel grill topper, designed for delicate food and small pieces that would fall through the grill grate: shish kabobs, onions, broccoli, asparagus, potatoes, fish

Fast Heating Pans, this perforated grill pans come with plenty of square holes on the bottom,small perforations allow heat and smoke to pass through food quickly and evenly, great for grilling meat, fish, veggies, steak, seafood and more

12" STAINLESS STEEL GRILL SKILLET & DEEP FRYER STRAINER IN ONE – This uniquely versatile stainless steel grill skillet doubles as a deep fryer strainer basket, delivering two essential cooking functions in a single tool. Shaped like a traditional fry pan for intuitive handling, it grills vegetables, shrimp, fish, and meats directly on your outdoor grill while preventing small ingredients from falling through the grates.
Know When They’re Perfectly Done
Look for deep grill marks and edges that yield slightly to pressure—trust your eyes and fingers, not thermometers.
How do you know when to pull them off? You’ll judge doneness by sight and taste, not thermometers. Look for deep grill marks and edges that yield slightly to pressure. Your grilling times depend on the variety of vegetables and your preferred texture, crisper at 10–20 minutes or softer near 25 minutes with temperature guidance at 400–425°F.
For even cooking, start denser vegetables first and finish with tender pieces in separate zones. You’ll avoid overcrowding and stick with even cuts, 1/3 to 1/2 inch thick, so everything finishes together.
Resting matters too. Pull vegetables off just before they reach ideal tenderness; they’ll finish cooking off-heat and reabsorb juices instead of drying out. Trust your eyes and fingers; you’ll know when they’re right.
Recommended Products

Compatibility: Compatible with 22" Weber charcoal kettle grills and other similar size kettle grills

Iconic blend of coarsely ground pepper, salt and garlic

Versatile Cooking: Use the split diffuser to cook with direct and indirect heat simultaneously, perfect for searing steaks while cooking vegetables at lower temperatures
Sauce While Hot for Maximum Flavor
Once you’ve pulled your vegetables off the grill, you’ve got a narrow window to lock in flavor. The heat opens their pores, so you’ll want to brush on your sauce immediately. That sizzle you hear? That’s tenderness forming as they absorb every drop.
A light coat of oil before grilling builds a protective char without burning. You finish with sauce after, not during, direct heat. This two-step method locks in moisture and creates depth.
Brush chimichurri on eggplant right off the flames. Melt miso butter over blistered corn while it’s still steaming. Drizzle chile oil on asparagus at the table. Toss peppers in soy-sesame glaze straight from the grate. Let zucchini drink up dressing as it rests, hot.
Move fast. The char fades, but flavor doesn’t have to.
Store and Reheat Without Losing the Char
Where do you put the leftovers when the grill’s still smoking?
First, you rest vegetables 5 minutes off the heat. This stops carryover cooking and locks in juices. Don’t skip this step; texture preservation starts here.
For storage, you spread grilled vegetables on a baking sheet in single-layer cooling. This drops temperature fast and prevents sogginess. Refrigerate once cooled.
Best For: Meal prep, next-day lunches, batch cooking.
When you’re ready to eat, you reheat in hot pan, not the microwave. A 10-inch skillet over high heat for 90 seconds restores char retention and slight browning. Brush with olive oil or sauce after warming for flavor restoration.
You control the outcome. Rest, cool single-layer, then sear hot. Your grilled vegetables taste fresh-fired every time.
Recommended Products

【Premium and Food Contact Safe Material/BBQ TOOL 】JY COOKEMNT Grill Basket is made of durable stainless steel material which is reusable and strong, also rust resistant for long time use. Food contact safe.

GREATEST GRILL GADGET - Kaluns Grill Basket is the most Essential BBQ accessory when preparing a Grilled Picnic.The great feature of adding Grilled taste to versatile food types can only be achieved with this Grill Basket. What can be better than a serving, of Grilled vegetables and Cheese? Definitley only a Grill Basket like Kaluns will bring mouthwatering grilled food to life!

【Removable Handle】The handle is crafted from solid wood, providing a non-slip and heat-insulating grip. To accommodate smoking and slow-cooking scenarios, the handle is designed to be removable. Although it is removable, it is reinforced to ensure a secure and stable connection between the handle and the basket.